I have section on my website which provides tutorials in a series format. These series are a collection of tutorials on the same topic. The title text for this section is - Mastering series aims to make you the best developer, out there. Generate an image which is a hero image for the home page of such a section.

A futuristic, high-tech hero image for a developer tutorial website. In the center, a glowing, translucent human brain made of neural networks and fiber-optic connections. Surrounding the brain are floating digital icons: a play button (YouTube style), a browser window with a globe, and several crystalline, geometric books. The scene is set in a dark, ethereal space with a teal, gold, and violet color palette. The composition features sharp isometric lines, glowing data streams, and bokeh particles. Minimalist aesthetic, highly detailed, strictly no text or labels, cinematic lighting, 8k resolution.
With this series, we will dive into the world of Apache Maven — a powerful tool that simplifies your project management like magic!
Whether you are just starting on your coding journey or you are a seasoned professional, looking to streamline your workflow, these videos have something for everyone.
We will break down the basics, showcase advanced features, and explore best practices, to elevate your development game.
We will start with absolute basics - What is Maven, Why is it so Popular, How it Works, and How can you use it, to build your applications, in the most efficient way.
Apache Maven or in short just Maven, is popular for its build capabilities. That is why, most people refer to Maven, as a Build Automation tool, or in short - just a Build Tool.
Yet, Maven is not just a build tool; but it is more than that. The project team responsible for the development and maintenance of Maven, describes Maven as a software project management and comprehension tool.
Based on the concept of a Project Object Model (POM), Maven can manage a project’s build, reporting and documentation from a central piece of information.
Do remember this term, Project Object Model or in short POM, because you will hear and use it all the time when talking about Maven. We will discuss POM in detail in our later videos.
So, as you can see, Maven aims to be, more than, just a Build Automation Tool.
More than a Build Tool
But, you might ask, what do we mean by “More than a Build Tool”?
Well, apart from providing the build capabilities, which comprise of:
Pre-processing - where-in you initialize your build which could mean setting up environment variables, processing some configuration files for the build, copying files if you need, and then
Compile - where you take the actual source code and compile to ensure there are no errors in your code, and then you
Test - the code by running the automation tests (be it unit test or integration test) and once, your code is tested, you
Package - your code where-in, you will be creating a jar file or zip file or a docker image or whatever your packaging need is. And finally, you
Distribute it - So, you would be publishing to your company’s repository of artifacts or deploy the packaged artifact on a server.
But apart from all of this (the build tooling), Maven can do things like generating reports. These reports could be a Unit Test report, or you have a tool that does some Performance testing of your application. Maven can take the performance test data and generate a report and publish them.
You can also generate a documentation website from Maven. People who are familiar with Javadoc, Maven provides support to generate Javadoc, which is a very common documentation format for Java source code.
What else - you can also use it to communicate within your team. Maven can act as a team member and can send you notification on your Slack or Hangouts or any other messenger.
And it can do a lot - a lot more things.
Dependencies
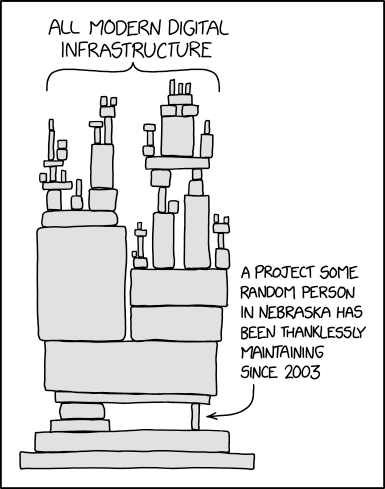
All applications built today have dependencies.
The below XKCD diagram depicts the nature of modern day applications and their interdependence.
As much as using dependencies allows us to quickly build the applications, dependency management becomes important.
One of the biggest benefits or features that Maven brings with it, is Dependency Management. If you have ever worked with Apache ANT, you will know how much things got better, when you started using Maven.
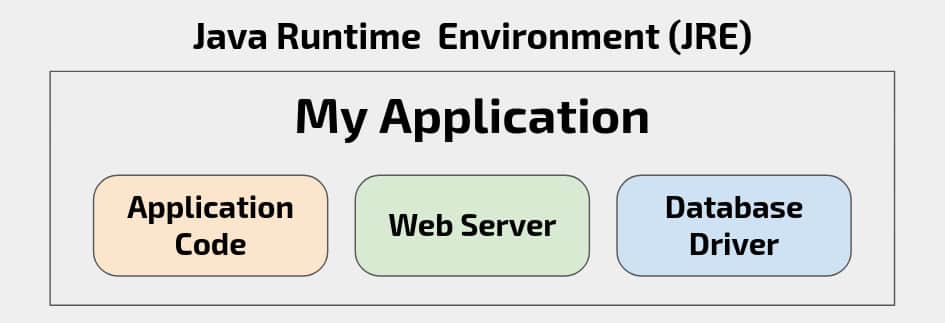
A typical Java application these days has multiple dependencies. For example, here I have an application which has 2 dependencies. A Web Server that is going to handle requests(Tomcat or Jetty), and I have a database driver that allows me to connect to the database.
Without Maven, I will need to download the jars from the internet, copy them to the library folder, and then add these in the application classpath. Now, when I run the application, after compilation and building, the application works.
Now, that’s a lot of manual work.
Instead of manually managing these dependencies, I can configure these dependencies in Maven and let Maven do the hard work. Maven will download the jar files from the internet, use them for compiling, testing and then package it along with the final packaged artifact.
You might think, these are just two files and I can manage that. But these days, a typical java application has easily more than 10 dependencies/jar files. If you start managing these dependencies manually, trust me, it is going to be a nightmare.
Managing Dependencies Manually (an example)
In fact, let me give you an example how managing dependency manually can easily go out of control.
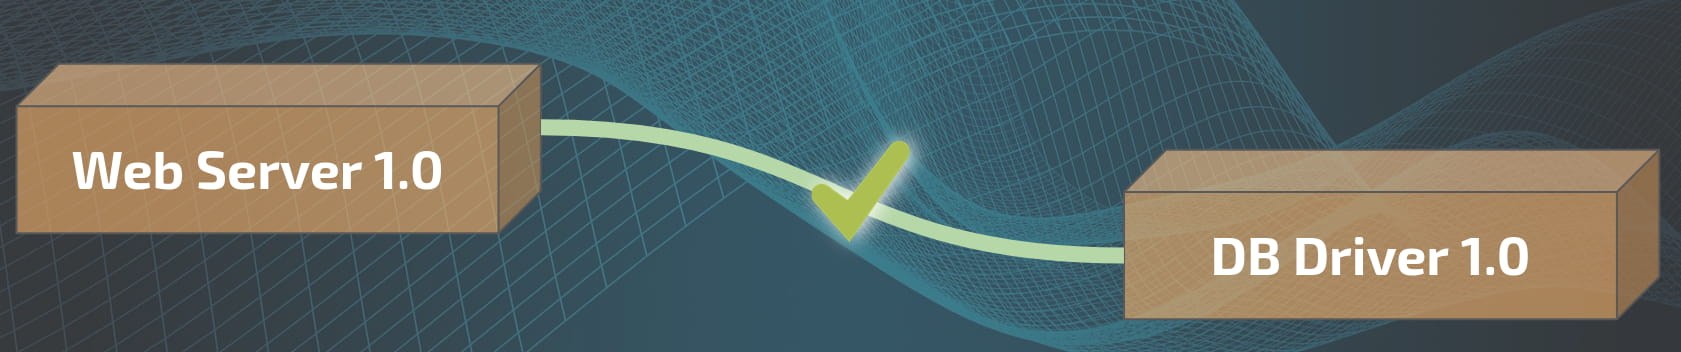
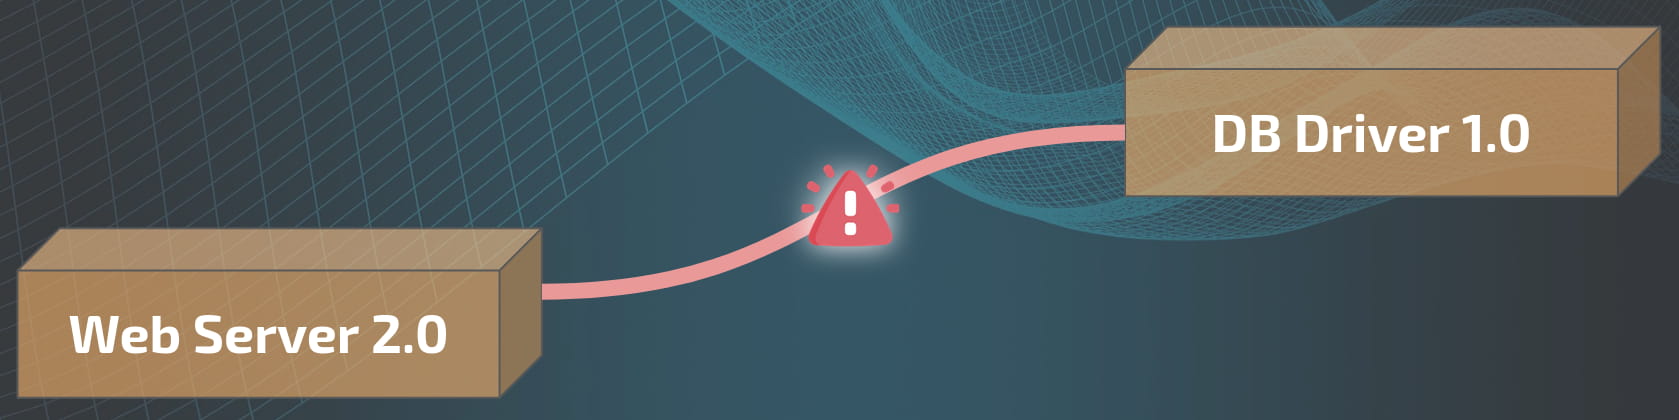
So taking the previous example, we have WebServer version 1.0 and DB Driver version 1.0 in the application. The application is running fine and there are no issues.
Consider, there is a critical security bug reported in Web Server 1.0 (and this happens all the time). Developers managing Web Server, fix the security bug and release a new version. This new version is Web Server 2.0. Since we do not want the security bug to affect our application, we will need to update the Web Server dependency from 1.0 to 2.0. So, we will download the latest Web Server 2.0 jar, and add it to the application.
But, when we try to run the application, it fails. Why?
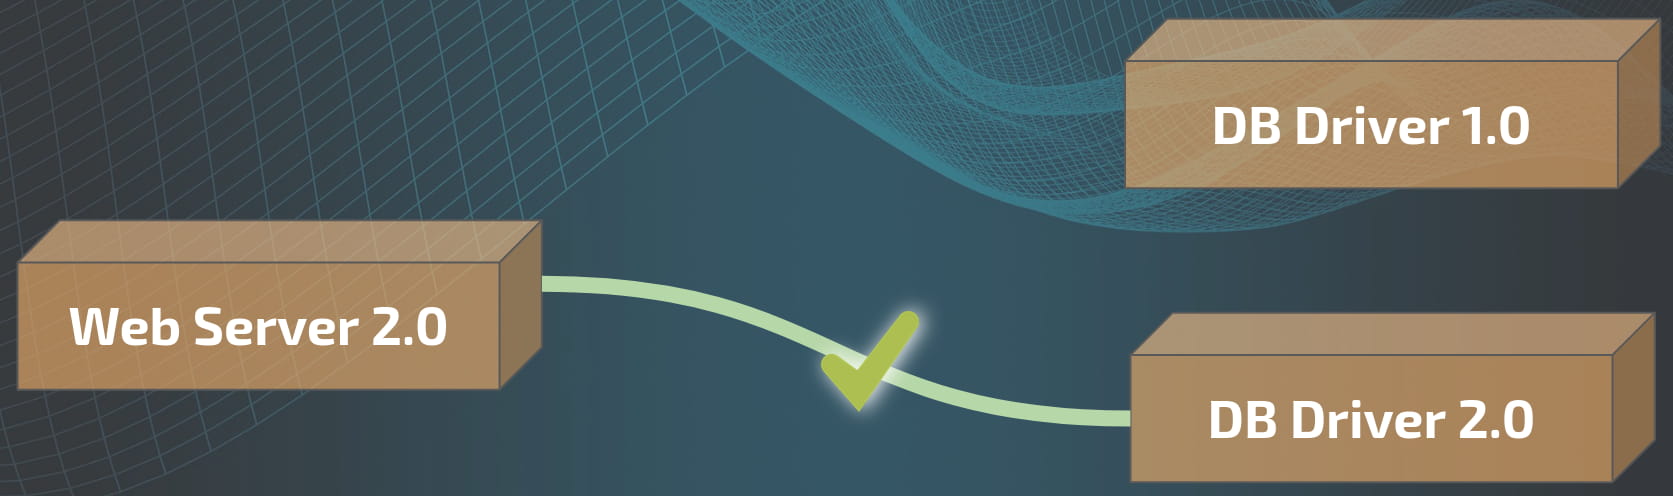
Because, in a hurry to fix the security bug, WebServer 2.0 became incompatible with DB Driver 1.0. Developers of DB Driver, on realizing this, fixes the compatibility issue and releases their version DB Driver version 2.0.
So, what will we have to do now?
Again the same process, update DB Driver to version 2.0. We download the jar file, add it to our application and then now, the application starts to run again.
This is a very simple example with just 2 dependencies. Manual dependency management gets really, really complicated once you start to deal with dependency over 10.
Worse, you update a single dependency, and you see multiple other dependencies becoming incompatible with each other. There is a cascading update of the dependencies required, until all incompatibilities are resolved, to eventually have the application work fine.
We will configure both Web Server and DB Driver dependency in the Maven configuration file. Whenever we update any of the dependencies, all related compatible dependencies are also fetched by Maven.
In our example, when we update Web Server 2.0 in the Maven configuration file, Maven automatically fetches the compatible DB Driver 2.0.
And all this happens magically, under the hood. All you do is update the Maven configuration file, and Maven does the magic for you.
How Maven does its Magic?
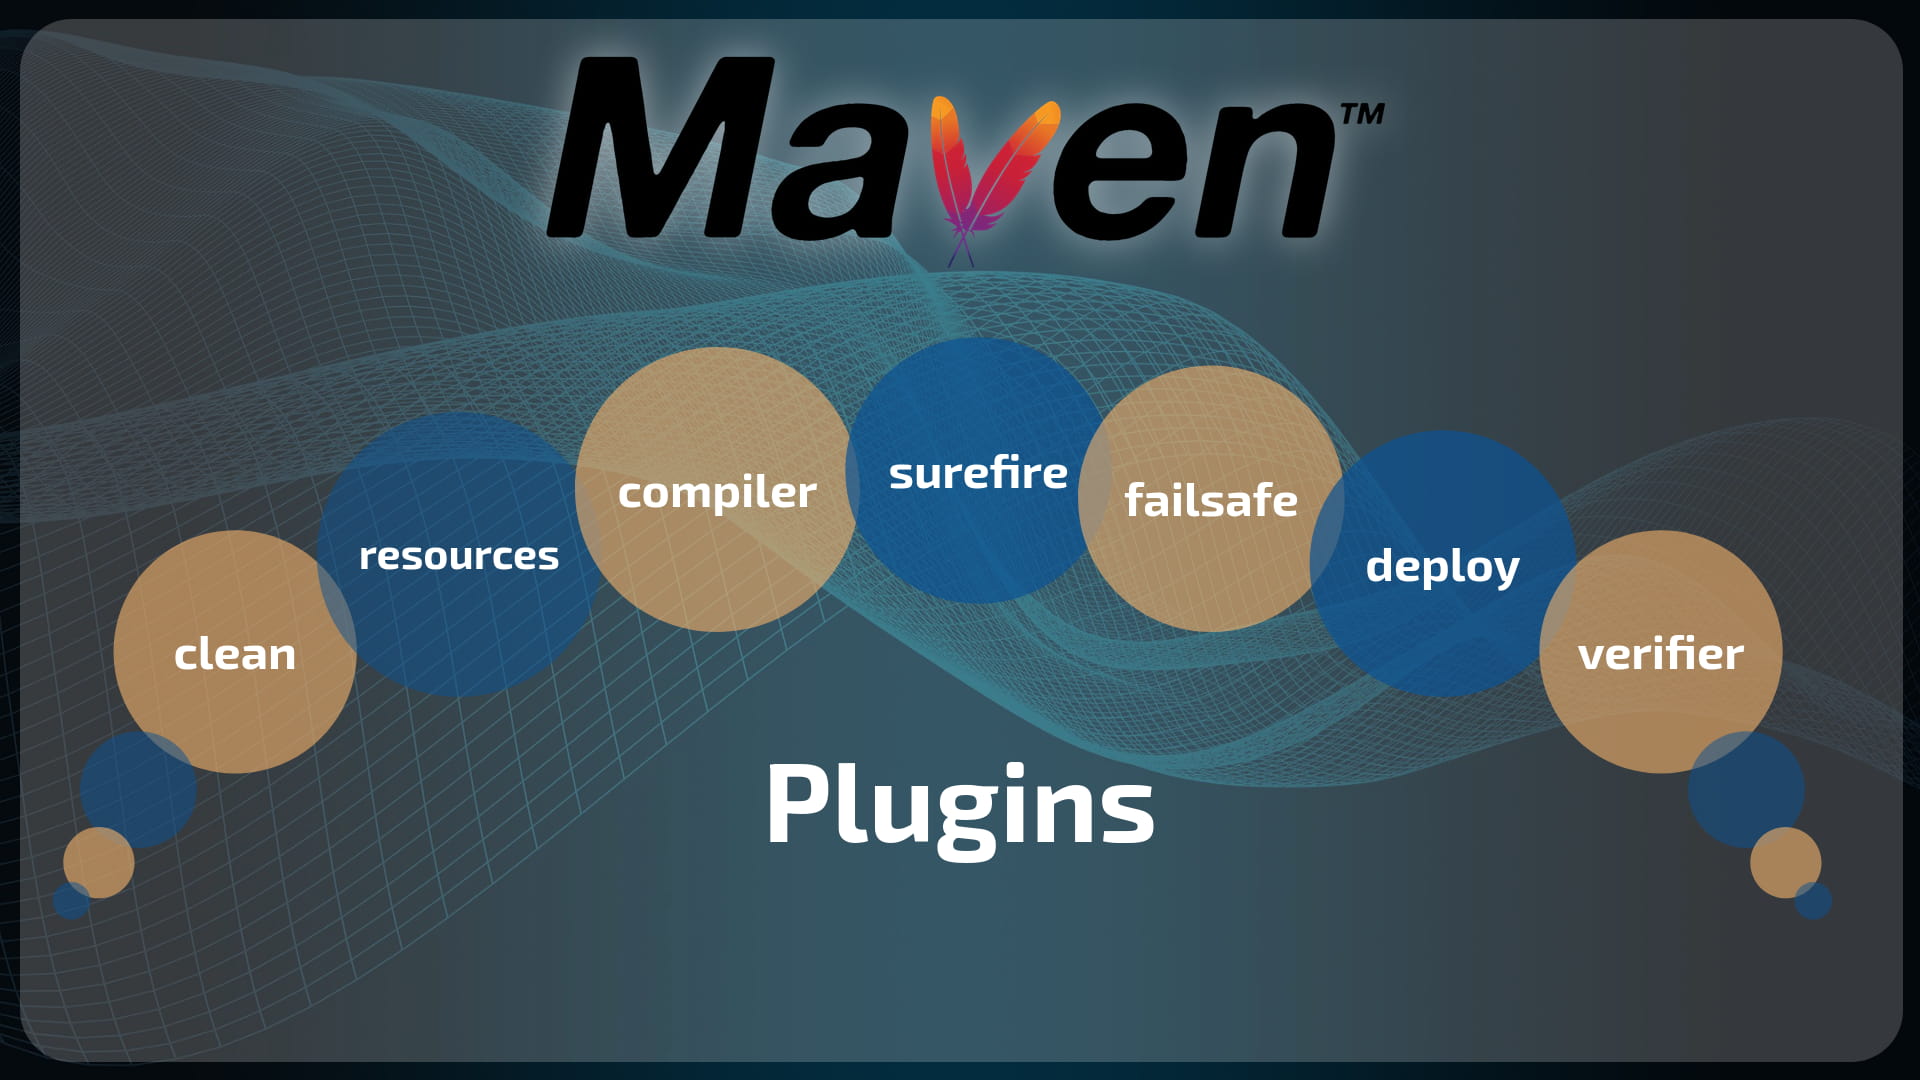
But, you might wonder - how does Maven do all this Magic? The answer to that question is - Plugins.
Maven makes use of Plugins. Whatever activity you can think of, there is a plugin for that activity.
In fact, there is even a plugin to create the Maven project structure called archetype. It allows you to create your starting project structure - your folders for source code, folder for test classes, and then create the Maven configuration file, so that you can adjust settings as per your need.
Whatever Maven does, it does it with the help of plugins. These plugins contain the code to perform the activity. Maven just triggers the plugin code as per user’s needs, via the Maven configuration file.
Is Maven multi-platform?
Maven works on all three platforms, Windows, Mac and Linux. All, you need is Java installed on your system to run Maven on your system.
And that is a very brief introduction to Apache Maven.
This article gives you a step by step walkthrough for installing Apache Maven on Linux.
You can watch the entire installation demo in this video.
Introduction
Apache Maven is the most popular build and project management tool for Java projects. Maven is built on top of Java, so if you plan to install Maven on your system, you need to have Java installed on your system.
Installation of Maven on any system consists of following 3 steps.
Download the Apache Maven binary zip from the official website
Extracting the binary zip into a specific folder
Configure the environment variables of the System.
Let me walk you through these steps in detail for a Linux system.
Info
The latest Apache Maven version at the time of writing this is 3.9.9. All screenshots and commands in this article refer to this version. But they are equally applicable to other versions, as well.
1. Downloading the Apache Maven
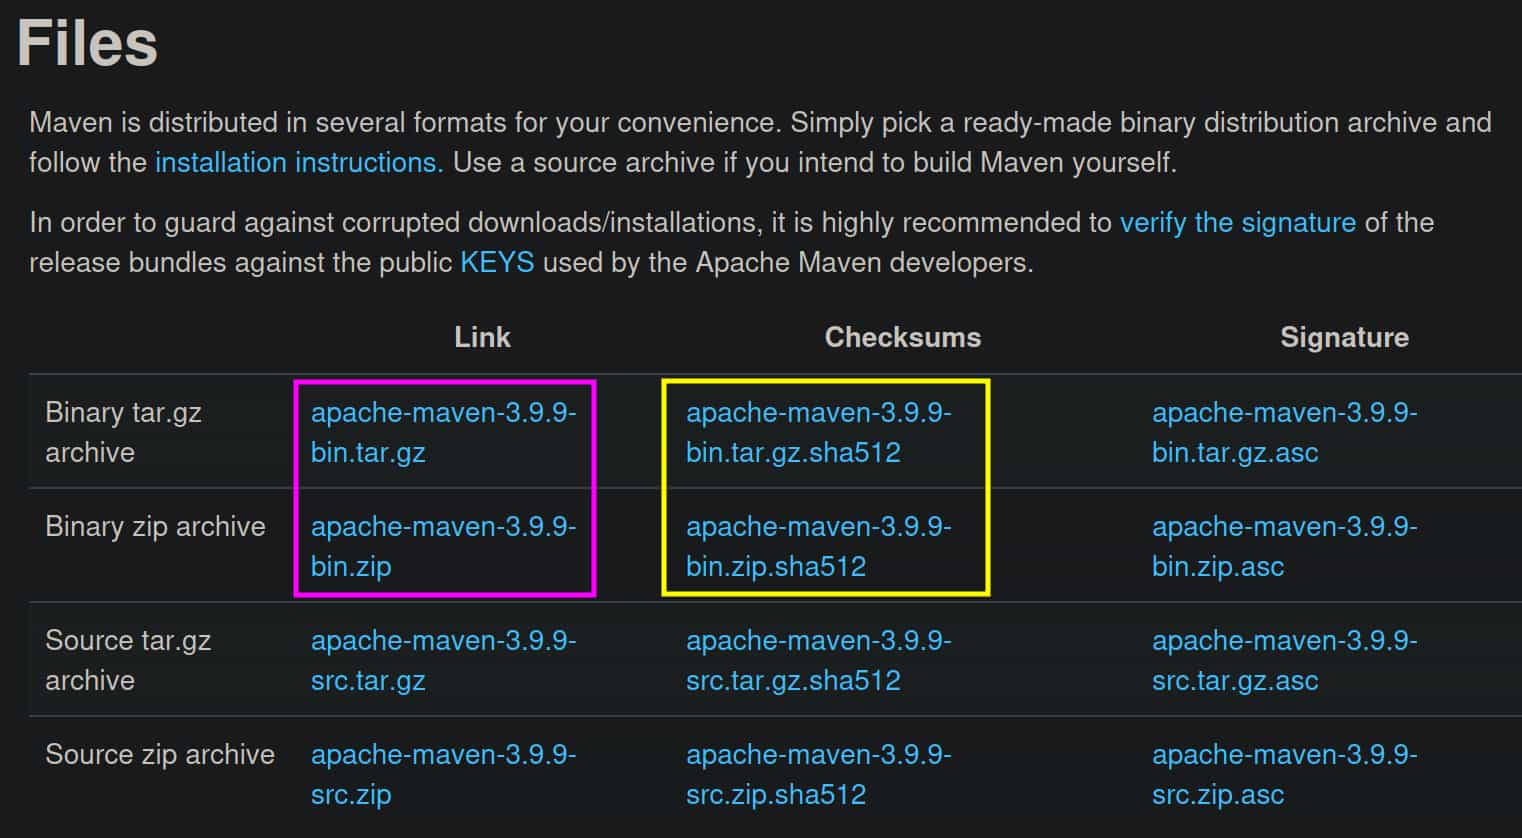
The first step is to download the Apache Maven from the official website. The downloads page for Apache Maven is this - https://maven.apache.org/download.cgi. On this page, you have two binary options to download - either a zip file or a tar.gz file(marked in blue boxes). Here is the screenshot below.
You can choose either of these. If you are not sure, choose the zip file. Also, download the corresponding checksum file(marked in orange boxes) so that you can validate the zip file download.
You can use your browser to download these, or you can use the wget or curl on the command prompt to download the files.
Here is the command using the wget that download the zip file and the corresponding checksum file.
-> wget -q --show-progress https://dlcdn.apache.org/maven/maven-3/3.9.9/binaries/apache-maven-3.9.9-bin.zip

apache-maven-3.9.9-bin.zip      100%[======================================================>]   8.78M  17.8MB/s    in 0.5s


-> wget -q --show-progress https://downloads.apache.org/maven/maven-3/3.9.9/binaries/apache-maven-3.9.9-bin.zip.sha512
apache-maven-3.9.9-bin.zip.sha5 100%[======================================================>]     128  --.-KB/s    in 0s

-> ls -l
-rw-rw-r-- 1 thedevjournal thedevjournal 9202456 Jan 27 15:24  apache-maven-3.9.9-bin.zip
-rw-rw-r-- 1 thedevjournal thedevjournal     128 Jan 27 15:26  apache-maven-3.9.9-bin.zip.sha512
Tip
If you don’t have wget and/or curl installed, you can run sudo apt install wget curl -y. Find more install options here - for wget, and for curl
2. Extracting the Binary archive File
2.1. Verifying the Checksum
Before you extract the zip or tar.gz file, perform a quick checksum validation of the downloaded file to ensure that there were no issues with the download.
The checksum files mentions which kind of hash is used for zip file. Its sha512, and hence we need sha512sum command to calculate the checksum of the zip file. This command is part of coreutils package and if you don’t have install, you can install it with your package manager. Here is a list of installation commands for installing coreutils on your Linux distribution.
-> sha512sum apache-maven-3.9.9-bin.zip
8beac8d11ef208f1e2a8... (removed in favour of brevity) ...82ee8a2ff4c4418ba  apache-maven-3.9.9-bin.zip

-> cat apache-maven-3.9.9-bin.zip.sha512
8beac8d11ef208f1e2a8... (removed in favour of brevity) ...82ee8a2ff4c4418ba
A quick glance, you would see that both the checksums are same and that ensures that the download was completed without any errors.
2.2. Installation Directory
Before we extract the binary archive file, we need a directory. It is a good practice to keep all of your installations together, so you can place them in a directory called installed in your home directory(~).
You can create this directory if it does not exist using the mkdir command. Inside this installed directory, we need to create our maven3 directory where we will extract our binary archive file. You can create these directories like this.
-> mkdir -p ~/installed/maven3
Afterwards, we need to move our binary archive file in this maven3 directory, and then we cd into this directory so that we can extract the archive file here.
-> mv apache-maven-3.9.9-bin.zip ~/installed/maven3/

-> cd ~/installed/maven3
2.3. Extracting the Binary file
If you have downloaded the zip file, you will need unzip command to extract the zip file. After extracting the zip file, you won’t need it, so you can delete that.
And if you have downloaded the tar.gz file, you will need tar command.
-> tar -xf apache-maven-3.9.9-bin.tar.gz

-> rm apache-maven-3.9.9-bin.tar.gz -f
Creating a Symbolic Link
You don’t need to create a symbolic link to the newly extracted folder, but it will make your life easier if a symbolic link always pointed to latest Maven installation.
So, if next time, you upgrade the Maven installation from 3.9.9 to 3.9.10, you can just update the symbolic link and everything should continue to work as it is. You won’t have to update any environment variables(discussed in the next section)
Here is how you will create a symbolic link.
-> ln -s apache-maven-3.9.9 latest
Configure the Environment Variables
With the extraction of binary archive file in the installed/maven3 directory, Maven is pretty much installed in your system. The only gotcha is that every-time you need to run the mvn command, you will have to traverse the entire path - ~/installed/maven3/latest/bin/mvn. It will be much better, if we could just run the mvn command from any directory without specifying the entire path to the mvn executable.
A lot of Java tools look for M2_HOME environment variable to locate the Maven installation directory in the system. This environment variable can be configured in any of your .bash_profile, .bashrc, .profile file. This is the entry that you will need to put.
export M2_HOME="~/installed/maven3/latest"
Once, this is configured, we need to configure the PATH variable, that will enable running of the mvn command from any directory. Here is how, it will be configured in your .bashrc or .bash_profile file.
export PATH="$PATH:$M2_HOME/bin"
Once this is configured, you need to re-import the configurations. Simple close the current terminal window and open a new one.
And now if you run mvn -version, you should see the Maven installation details confirming that you have Apache Maven installed successfully.
This article gives you a step by step walkthrough for installing Apache Maven on Mac.
You can watch the entire installation demo in this video.
Introduction
Apache Maven is the most popular build and project management tool for Java projects. Maven is built on top of Java, so if you plan to install Maven on your system, you need to have Java installed on your system.
Installation of Maven on any system consists of following 3 steps.
Download the Apache Maven binary zip from the official website
Extracting the binary zip into a specific folder
Configure the environment variables of the System.
Let me walk you through these steps in detail for a Mac system.
Info
The latest Apache Maven version at the time of writing this is 3.9.9. All screenshots and commands in this article refer to this version. But they are equally applicable to other versions, as well.
1. Downloading the Apache Maven
The first step is to download the Apache Maven from the official website. The downloads page for Apache Maven is this - https://maven.apache.org/download.cgi. On this page, you have two binary options to download - either a zip file or a tar.gz file(marked in blue boxes). Here is the screenshot below.
You can choose either of these. If you are not sure, choose the zip file. Also, download the corresponding checksum file(marked in orange boxes) so that you can validate the zip file download.
You can use your browser to download these, or you can use the wget or curl on the command prompt to download the files.
Here is the command using the wget that download the zip file and the corresponding checksum file.
-> wget -q --show-progress https://dlcdn.apache.org/maven/maven-3/3.9.9/binaries/apache-maven-3.9.9-bin.zip

apache-maven-3.9.9-bin.zip      100%[======================================================>]   8.78M  17.8MB/s    in 0.5s


-> wget -q --show-progress https://downloads.apache.org/maven/maven-3/3.9.9/binaries/apache-maven-3.9.9-bin.zip.sha512
apache-maven-3.9.9-bin.zip.sha5 100%[======================================================>]     128  --.-KB/s    in 0s

-> ls -l
-rw-rw-r-- 1 thedevjournal thedevjournal 9202456 Jan 27 15:24  apache-maven-3.9.9-bin.zip
-rw-rw-r-- 1 thedevjournal thedevjournal     128 Jan 27 15:26  apache-maven-3.9.9-bin.zip.sha512
Tip
If you don’t have wget and/or curl installed, you can install these through homebrew via brew install wget and/or brew install curl.
2. Extracting the Binary archive File
2.1. Verifying the Checksum
Before you extract the zip or tar.gz file, perform a quick checksum validation of the downloaded file to ensure that there were no issues with the download.
The checksum files mentions which kind of hash is used for zip file. Its sha512, and hence we need shasum command to calculate the checksum of the zip file.
-> shasum -a 512 apache-maven-3.9.9-bin.zip
8beac8d11ef208f1e2a8... (removed in favour of brevity) ...82ee8a2ff4c4418ba  apache-maven-3.9.9-bin.zip

-> cat apache-maven-3.9.9-bin.zip.sha512
8beac8d11ef208f1e2a8... (removed in favour of brevity) ...82ee8a2ff4c4418ba
A quick glance, you would see that both the checksums are same and that ensures that the download was completed without any errors.
2.2. Installation Directory
Before we extract the binary archive file, we need a directory. It is a good practice to keep all of your installations together, so you can place them in a directory called installed in your home directory(~).
You can create this directory if it does not exist using the mkdir command. Inside this installed directory, we need to create our maven3 directory where we will extract our binary archive file. You can create these directories like this.
-> mkdir ~/installed
-> mkdir ~/installed/maven3
Afterwards, we need to move our binary archive file in this maven3 directory, and then we cd into this directory so that we can extract the archive file here.
-> mv apache-maven-3.9.9-bin.zip ~/installed/maven3/

-> cd ~/installed/maven3
2.3. Extracting the Binary file
If you have downloaded the zip file, you will need unzip command to extract the zip file. After extracting the zip file, you won’t need it, so you can delete that.
And if you have downloaded the tar.gz file, you will need tar command.
-> tar -xf apache-maven-3.9.9-bin.tar.gz

-> rm apache-maven-3.9.9-bin.tar.gz
Creating a Symbolic Link
You don’t need to create a symbolic link to the newly extracted folder, but it will make your life easier if a symbolic link always pointed to latest Maven installation.
So, if next time, you upgrade the Maven installation from 3.9.9 to 3.9.10, you can just update the symbolic link and everything should continue to work as it is. You won’t have to update any environment variables(discussed in the next section)
Here is how you will create a symbolic link.
-> ln -s apache-maven-3.9.9 latest
Configure the Environment Variables
With the extraction of binary archive file in the installed/maven3 directory, Maven is pretty much installed in your system. The only gotcha is that every-time you need to run the mvn command, you will have to traverse the entire path - ~/installed/maven3/latest/bin/mvn. It will be much better, if we could just run the mvn command from any directory without specifying the entire path to the mvn executable.
A lot of Java tools look for M2_HOME environment variable to locate the Maven installation directory in the system. This environment variable can be configured in your .zshrc file. This is the entry that you will need to put.
Change devjournal to your username in the above path
Once, this is configured, we need to configure the PATH variable, that will enable running of the mvn command from any directory. Here is how, it will be configured in your .zshrc file.
export PATH="$PATH:$M2_HOME/bin"
Once this is configured, you need to re-import the configurations. Simple close the current terminal window and open a new one.
And now if you run mvn -version, you should see the Maven installation details confirming that you have Apache Maven installed successfully.
This article gives you a step by step walkthrough for installing Apache Maven on Mac.
You can watch the entire installation demo in this video.
Introduction
Apache Maven is the most popular build and project management tool for Java projects. Maven is built on top of Java, so if you plan to install Maven on your system, you need to have Java installed on your system.
Installation of Maven on any system consists of following 3 steps.
Download the Apache Maven binary zip from the official website
Extracting the binary zip into a specific folder
Configure the environment variables of the System.
Let me walk you through these steps in detail for a Mac system.
Info
The latest Apache Maven version at the time of writing this is 3.9.9. All screenshots and commands in this article refer to this version. But they are equally applicable to other versions, as well.
1. Downloading the Apache Maven
The first step is to download the Apache Maven from the official website. The downloads page for Apache Maven is this - https://maven.apache.org/download.cgi. On this page, you have two binary options to download - either a zip file or a tar.gz file(marked in blue boxes). Here is the screenshot below.
You can choose either of these. If you are not sure, choose the zip file. Also, download the corresponding checksum file (marked in orange boxes) so that you can validate the zip file download.
You can use your browser to download these, or you can use the curl on the command prompt to download the files.
Here is the command using the curl that download the zip file and the corresponding checksum file.
Before you extract the zip file, perform a quick checksum validation of the downloaded file to ensure that there were no issues with the download.
The checksum files mentions which kind of hash is used for zip file. Windows provides CertUtil which allows to generate checksum of files using -hashfile operation. Since the Maven checksum file uses SHA-512 format, we also need to generate the hash in the same format.
PS C:\Users\thedevjournal\Downloads> CertUtil -hashfile .\apache-maven-3.9.9-bin.zip SHA512

SHA512 hash of .\apache-maven-3.9.9-bin.zip:
8beac8d11ef208f1e2a8... (removed in favour of brevity) ...82ee8a2ff4c4418ba
CertUtil: -hashfile command completed successfully.


PS C:\Users\thedevjournal\Downloads> cat .\apache-maven-3.9.9-bin.zip.sha512
8beac8d11ef208f1e2a8... (removed in favour of brevity) ...82ee8a2ff4c4418ba
A quick glance, you would see that both the checksums are same and that ensures that the download was completed without any errors.
2.2. Installation Directory
Before we extract the binary archive file, we need a directory. It is a good practice to keep all of your installations together, so you can place them in a directory called installed in your C drive(C:\).
You can create this directory if it does not exist using the mkdir command.
Afterwards, we need to move our binary archive file inside C:\installed directory, and then we cd into this directory so that we can extract the archive file here.
PS C:\Users\thedevjournal\Downloads> mv apache-maven-3.9.9-bin.zip C:\installed

PS C:\Users\thedevjournal\Downloads> cd C:\installed
2.3. Extracting the Binary file
You will use Expand-Archive command to extract the contents of the zip file.
PS C:\installed> Expand-Archive .\apache-maven-3.9.9-bin.zip
PS C:\installed> dir
Directory: C:\installed
Mode LastWriteTime Length Name
---- ------------- ------ ----
d----- 02-02-202505:35 apache-maven-3.9.9-bin
-a---- 02-02-202505:189202456 apache-maven-3.9.9-bin.zip
PS C:\installed> dir .\apache-maven-3.9.9-bin\
Directory: C:\installed\apache-maven-3.9.9-bin
Mode LastWriteTime Length Name
---- ------------- ------ ----
d----- 02-02-202505:35 apache-maven-3.9.9
Expand-Archive extracts the file contents inside the apache-maven-3.9.9-bin directory, hence we also need to move the new extracted folder 1 level above. And then, we can delete the zip file and the empty extraction folder.
With the extraction of binary archive file in the installed directory, Maven is pretty much installed in your system. The only gotcha is that every-time you need to run the mvn command, you will have to traverse the entire path - C:\installed\apache-maven-3.9.9\bin\mvn. It will be much better, if we could just run the mvn command from any directory without specifying the entire path to the mvn executable.
A lot of Java tools look for M2_HOME environment variable to locate the Maven installation directory in the system. This environment variable can be configured using [System.Environment]::SetEnvironmentVariable. This is the command:
The 3rd parameter, User indicates that you intend to store this variable across multiple sessions, and only available to the user who is logged in. If you want to set this variable system-wide, use Machine as the parameter.
Once, this is configured, we need to configure the PATH variable, that will enable running of the mvn command from any directory. Here is how, it will be configured:
This is my personal space to write my ideas, thoughts and perspective on different aspects of the world. These are my personal opinions. If you like them, great and if not, then let me know your thoughts.
Image generated with Google Gemini using the following prompt.

A futuristic, high-tech hero image for a developer blog. The scene is set in a dark (but not too black), a ethereal space with a teal, gold, and violet color palette. Extreme macro photography of a high-end black circuit board with gold-plated traces and a central processor. Instead of the central processor, have a parchment paper and a quill. Tiny glowing data pulses traveling through the pathways like a futuristic city at night. Shallow depth of field, sharp focus on the central hardware, industrial tech aesthetic, dark moody tones with gold accents. Translucent glass aesthetic.
Use hugo.IsServer to conditionally exclude integrations like analytics or comments from rendering on the local server.
{class=“children children-type-flat children-sort-”}
Hugo - Skip rendering certain elements on Local Server
With time, you will start to have more things integrated in the blog. For example, your analytics scripts or commenting scripts. While it might be ok include scripts for such integrations while setting them up, after you have done that, you might not want to include them locally, just to avoid additional calls and getting distracted, while you write.
A simple way to exclude such things to be excluded from rendering process on Local Server is by the use of conditionals with hugo.IsServer. Something like this.
{{ifnothugo.IsServer}} <!-- This is rendered only on Production Build -->
{{end}}
/reads
Welcome to my digital bookshelf. This is a curated collection of articles, social media posts, youtube videos, or any other digital links, that I found inspirational, insightful, or just something interesting.
This section follows the concept of /blogroll. I found them useful, and hopefully, you too find them interesting.
Image generated with Google Gemini using the following prompt.

I have a section on my person website called bookmarks. This follows the same concept as https://indieweb.org/bookmarks. Create an image as an abstract concept which resembles the same concept. Use a modern and futuristic theme. There should not be any text in the image.

A futuristic digital knowledge network visualization. A central wireframe dodecahedral globe holds a glowing multi-colored star-gem and labels like 'STRUCTURED KNOWLEDGE', 'SEMANTIC WEB', 'DATA STRUCTURES'. Intricate cyan-to-orange lines branch out to floating, illuminated digital books, some with smaller gems. Complex digital cityscape background. Cyan vs. orange lighting. Numerous small floating geometric shapes.
I wonder if today’s generation can ever really understand how powerful this is
A relationship only works if you behave mature. And being mature means, you understand what irritates you about the person you love, and know what buttons to trigger to irritate the person you love the most, and yet you chose to ignore that because this person loves you will all their heart.
A relationship can always work, if the people involved are willing to make it work. It cannot be any simpler than that.
/bookmarks
This is my personal bookmark. These are all tools, websites, that I have collected over a period of time.
This section follows the concept of /bookmark. I found them useful, and hopefully, you too find them interesting.
Image generated with Google Gemini using the following prompt.

I have a section on my person website called bookmarks. This follows the same concept as https://indieweb.org/bookmarks. Create an image as an abstract concept which resembles the same concept. Use a modern and futuristic theme. There should not be any text in the image.

A futuristic digital illustration of an open wireframe book glowing with neon blue and gold light. Floating crystal-like bookmarks with cords hover above the pages. The background features abstract network lines, glowing nodes, faint translucent books, and floating computer code snippets in a dark, ethereal cyber environment.
It is a great tool to identify and research what people are searching for online. While, the search is disrupted by AI, this is still relevant to see related concepts for a question. For example, below is the search report for all latest AI models as people search on the Web.
/notes
Everyone makes notes. Some do it in a dedicated tools, some do it a physical book, some use post-its. I like markdown files and they all are here.
Image generated with Google Gemini using the following prompt.

A futuristic, high-tech hero image for a section on my website that collect notes. Showcase this as a collection of post-it notes. The scene is set in a dark (share of blue), translucent glass aesthetic vibe, ethereal space with a teal, gold, and violet color palette. Tiny glowing data pulses traveling through the pathways like a futuristic city at night. Add bokeh effect, focus on the transparent glass aesthetic. There is no text on the post-it notes.
kitty - the fast, feature-rich, cross-platform, GPU based terminal
Configuration File
$HOME/.config/kitty/kitty.conf is where you will find the configuration file.
-> ls -l $HOME/.config/kitty/kitty.conf
.rw-rw-r--@ 88k thedevjournal  8 Feb  2025 /home/thedevjournal/.config/kitty/kitty.conf
Changing Font and Size
You can use the kitty +list-fonts to list the available fonts.
font_family      Operator Mono Book
bold_font        Operator Mono Medium
italic_font      Operator Mono Book Italic
bold_italic_font Operator Mono Medium Italic
font_size        16.0
Configure Scrollback
Indicates how many lines you can scroll back. Higher value means you can scroll up quite a lot, but at the cost of your memory.
Also, if you scroll using mouse, you might want to configure wheel_scroll_multiplier. This allows you to scroll faster with mouse wheel.
wheel_scroll_multiplier 5.0
Configuring Tabs
Basic
First and foremost, very basic configurations relating to tabs.
tab_bar_edge bottom # Where to place the tab bar (top or bottom). bottom is defaulttab_bar_margin_width 0.0 # The margin to the left and right of the tab bar (in pts).tab_bar_margin_height 0.0 0.0 # The margin above and below the tab bar (in pts)tab_bar_align left # Alignment of tab bars - left (default), center, righttab_bar_min_tabs 2# Min number of tabs to show the tab bartab_switch_strategy previous # Which tab to select when a tab is closed - previous(default), left or right, last
Style and Colors
The main configuration is tab_bar_style which takes values - fade (default), separator, powerline, custom, hidden. Following are few examples for reference.
background_opacity 1.0 # Configure opacity of the kitty windowbackground_image /home/absolute/path/to/the/png-image.png
background_image_layout scaled # Other values - tiled, mirror-tiled, scaled, clamped, centered, cscaledbackground_tint 0.2 # How much tint should be applied to background-image
Logo
You can also add a logo/watermark to your terminal using following configs.
window_logo_path /home/absolute/path/to/the/png-logo-image.png
window_logo_position bottom-right # Where is the logo placedwindow_logo_alpha 0.5 # How much does the logo fade into background
Borders
Border configs are as below:
window_margin_width 1# Have a bit of margin to enable the borders for split paneswindow_border_width 3px # Width of the borderswindow_padding_width 5# Padding of content inside the window (all 4 sides)window_padding_width 535# Padding of content inside the window (top horizontal bottom)window_padding_width 51053# Padding of content inside the window (top right bottom left)active_border_color #00FF00 # Border color for active window panelinactive_border_color #333333 # Border color for inactive window panelinactive_text_alpha 0.25 # Dim the text in the inactive window panel
Clipboard
Copy on Select
copy_on_select yes
Right click to Paste
mouse_map right click ungrabbed paste_from_selection
Commands
kitty +list-fonts
Allows you to see available fonts and configure the one of your choice.
-> kitty +list-fonts
 Andale Mono             ∥                                               Mononoki Nerd Font
 Courier                 ∥
 Courier 10 Pitch        ∥ Styles: Bold, Bold Italic, Italic, Regular
 Courier New             ∥
 DejaVu Sans Mono        ∥ Press the Enter key to choose this family
 FreeMono                ∥
 IPAGothic               ∥ --------------------------------------------------- preview ---------------------------------------------------
 Liberation Mono         ∥ abcdefghijklmnopqrstuvwxyz 0123456789 ABCDEFGHIJKLMNOPQRSTUVWXYZ !"#$%&'()**+, - . /:; <<=>?@[]^_`{|}"~
 Mitra                   ∥
>Mononoki Nerd Font      ∥
 Mononoki Nerd Font Mono ∥
 Nimbus Mono PS          ∥
 Noto Mono               ∥
 Noto Sans SignWriting   ∥
 Ubuntu Mono             ∥
 Ubuntu Sans Mono        ∥
 Unifont                 ∥
 Unifont CSUR            ∥
 Unifont Sample          ∥
 Unifont Upper           ∥
 Unifont-JP              ∥