Installing Maven - Linux
This article gives you a step by step walkthrough for installing Apache Maven on Linux.
You can watch the entire installation demo in this video.
Introduction
Apache Maven is the most popular build and project management tool for Java projects. Maven is built on top of Java, so if you plan to install Maven on your system, you need to have Java installed on your system.
Installation of Maven on any system consists of following 3 steps.
- Download the Apache Maven binary zip from the official website
- Extracting the binary zip into a specific folder
- Configure the environment variables of the System.
Let me walk you through these steps in detail for a Linux system.
Info
The latest Apache Maven version at the time of writing this is 3.9.9. All screenshots and commands in this article refer to this version. But they are equally applicable to other versions, as well.
1. Downloading the Apache Maven
The first step is to download the Apache Maven from the official website. The downloads page for Apache Maven is this - https://maven.apache.org/download.cgi. On this page, you have two binary options to download - either a zip file or a tar.gz file(marked in blue boxes). Here is the screenshot below.
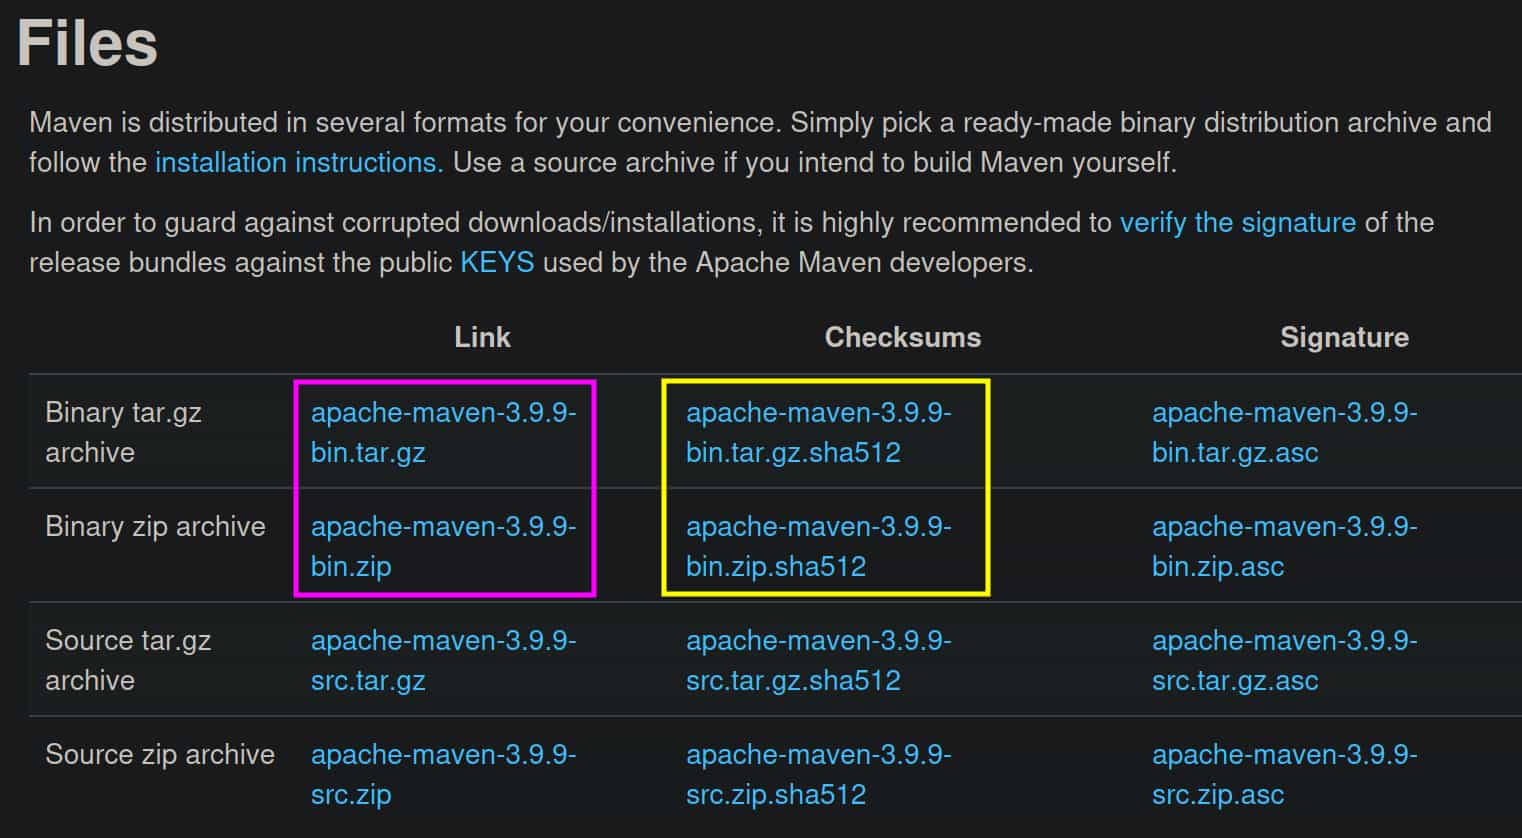
You can choose either of these. If you are not sure, choose the zip file. Also, download the corresponding checksum file(marked in orange boxes) so that you can validate the zip file download.
You can use your browser to download these, or you can use the wget or curl on the command prompt to download the files.
Here is the command using the wget that download the zip file and the corresponding checksum file.
Tip
2. Extracting the Binary archive File
2.1. Verifying the Checksum
Before you extract the zip or tar.gz file, perform a quick checksum validation of the downloaded file to ensure that there were no issues with the download.
The checksum files mentions which kind of hash is used for zip file. Its sha512, and hence we need sha512sum command to calculate the checksum of the zip file. This command is part of coreutils package and if you don’t have install, you can install it with your package manager. Here is a list of installation commands for installing coreutils on your Linux distribution.
A quick glance, you would see that both the checksums are same and that ensures that the download was completed without any errors.
2.2. Installation Directory
Before we extract the binary archive file, we need a directory. It is a good practice to keep all of your installations together, so you can place them in a directory called installed in your home directory(~).
You can create this directory if it does not exist using the mkdir command. Inside this installed directory, we need to create our maven3 directory where we will extract our binary archive file. You can create these directories like this.
Afterwards, we need to move our binary archive file in this maven3 directory, and then we cd into this directory so that we can extract the archive file here.
2.3. Extracting the Binary file
If you have downloaded the zip file, you will need unzip command to extract the zip file. After extracting the zip file, you won’t need it, so you can delete that.
And if you have downloaded the tar.gz file, you will need tar command.
Creating a Symbolic Link
You don’t need to create a symbolic link to the newly extracted folder, but it will make your life easier if a symbolic link always pointed to latest Maven installation.
So, if next time, you upgrade the Maven installation from 3.9.9 to 3.9.10, you can just update the symbolic link and everything should continue to work as it is. You won’t have to update any environment variables(discussed in the next section)
Here is how you will create a symbolic link.
Configure the Environment Variables
With the extraction of binary archive file in the installed/maven3 directory, Maven is pretty much installed in your system. The only gotcha is that every-time you need to run the mvn command, you will have to traverse the entire path - ~/installed/maven3/latest/bin/mvn. It will be much better, if we could just run the mvn command from any directory without specifying the entire path to the mvn executable.
A lot of Java tools look for M2_HOME environment variable to locate the Maven installation directory in the system. This environment variable can be configured in any of your .bash_profile, .bashrc, .profile file. This is the entry that you will need to put.
Once, this is configured, we need to configure the PATH variable, that will enable running of the mvn command from any directory. Here is how, it will be configured in your .bashrc or .bash_profile file.
Once this is configured, you need to re-import the configurations. Simple close the current terminal window and open a new one.
And now if you run mvn -version, you should see the Maven installation details confirming that you have Apache Maven installed successfully.
Now, you can start to run your builds locally with Maven on your Linux system.